
Apollo 600 Shot Blast Helmet
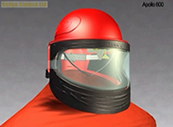
Click the thumbnail image above to watch an animation of the Apollo 600.
The Apollo 600 CE was specially developed and approved for blasting (MSHA - NIOSH).
The helmet has an assigned protection factor of 2000 inconsideration of BS EN14594.
The following Warnings and Limitations have to be followed:
- The Apollo 600 CE is not suitable for other work such as welding or painting!
- Only for use in an atmosphere which does not represent any imminent danger for life and health and which contains a minimum oxygen volume of 19.5%.
- Do not use this product with pure oxygen or with oxygen enriched air.
- Do not use this product in flammable atmospheres.
- The Apollo 600 CE protects the wearer’s head and neck from impact and abrasion caused by abrasive ricochet.
- The helmet is suitable for use when the head is vertical or near vertical. When used in a horizontal posture, the air indicator will not work.
- The helmet can be used at temperatures between -6° and 40°C.
- If the product is used below a temperature of 4°C the water content has to be reduced to avoid freezing.
- The compressed air supply must have a pressure between 6 and 8 bar. To be sure of this pressure you can use our Air Filter CPF 20 which has an integrated pressure regulator.
- During a period of maximum breathing rate and maximum effort, a negative pressure may occur in the helmet.
The main components for the minimal version from a respirator are as follows:
· Helmet with cape attachment strap, suspension and adapted cape
· Breathing air-hose (length: approx. 1000mm)
· Breathing air-supply hose (length: 10m) with quick-fitting pipe union (female)
· Air control valve
Before using your Apollo 600 helmet
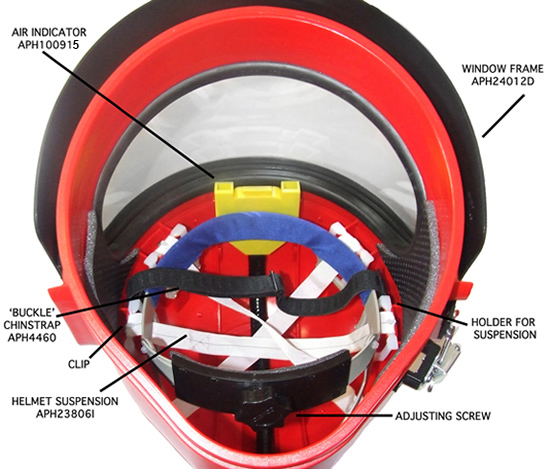
1. Adjust Helmet Suspension |
- Adjust the helmet suspension by turning the knob to suit your head size and adjust chin strap to correct length. |
2. Check that the lens system is in place |
- Inner lens |
3. Air supply Hose |
- Use the quick release coupling to attach the air supply hose to the air control valve. |
4. Air Supply |
- Start compressor |
5. Check Air Pressure |
Pressure must be set with the connected respirator. |
6. Check Equipment |
Check all safety and breathing equipment used in conjunction with the respirator, as recommended by the manufacturer. |
7. Put the respirator on |
- Put the respirator on (keep it as upright as possible to prevent abrasive from falling inside.) |
Pull out suspension assembly carefully from the six adaptors.
The clips are supposed to fix the suspension in the helmet crown. The curved side has to face the centre of the helmet.
When placing the new suspension check that the chinstrap is placed in front of the suspension assembly.